Set up on Linux
This is the full guide for Linux (Ubuntu and most other common distributions). It's a little more terminal-friendly than the Windows/Mac guides, which suits Linux — but every command is copy-paste, and we explain what each does.
What we're about to do
Install Docker → download backscatter → tell it where you live → start it → open it in your browser.
Step 1 — Install Docker Engine
On Linux you install Docker Engine (no "Desktop" needed). The easiest reliable way is Docker's official convenience script:
curl -fsSL https://get.docker.com | sh
That downloads and installs Docker. Then let your user run Docker without typing sudo
every time:
sudo usermod -aG docker $USER
Log out and back in (or reboot) so that change takes effect.
Check it's working:
docker run --rm hello-world
If you see a "Hello from Docker!" message, you're set.
Distribution specifics
The convenience script supports Ubuntu, Debian, Fedora, and more. If you'd rather
install from your distribution's repositories, follow Docker's official guide:
https://docs.docker.com/engine/install/. You also want the Compose plugin
(docker compose version should print a version — the convenience script includes
it).
Step 2 — Download backscatter
Either clone it with git:
git clone https://github.com/kbennett2000/backscatter.git
cd backscatter
…or, if you don't use git, download and unzip:
curl -L -o backscatter.zip https://github.com/kbennett2000/backscatter/archive/refs/heads/main.zip
unzip backscatter.zip
cd backscatter-main
Step 3 — Tell it where you live
Copy the example config and open it:
cp .env.example .env
nano .env      # or use any text editor you like
Find the line starting with BACKSCATTER_LOCATIONS= and change the numbers to your own
latitude and longitude:
BACKSCATTER_LOCATIONS=[{"name":"Home","lat":39.3603,"lon":-104.5969,"default":true}]
Replace 39.3603 with your latitude and -104.5969 with your longitude; keep the quotes
and brackets. In nano, save with Ctrl+O, Enter, then exit with Ctrl+X.
How do I find my latitude and longitude?
Open Google Maps, right-click your town, and click the numbers at the top of the menu to copy them. First is latitude, second is longitude.
Permissions: which user runs it?
backscatter writes your saved radar to the data/ folder as your user. The bundled
docker-compose.yml runs the container as 1000:1000 (the typical first Linux user).
If your id -u / id -g aren't 1000, set PUID and PGID in .env to match. On
rootless Docker, comment out the user: line in docker-compose.yml instead (see
the comments there).
More options (retention, extra locations) are on Configure it — the one line above is all you need to start.
Step 4 — Start it
From the project folder:
docker compose up -d --build
The first run downloads and builds everything (several minutes, lots of output). It's
done when your prompt returns and you see lines ending in Started. Watch the logs with:
docker compose logs -f
(Press Ctrl+C to stop watching — that doesn't stop backscatter.)
That's the hard part over
Next time, just docker compose up -d (no --build).
Step 5 — Open it
Open your web browser and go to:
Want a different port?
8085 is the default. If it's already taken — or you just prefer another number —
change BACKSCATTER_PORT in your .env file, run docker compose up -d again, and
use that number here instead.
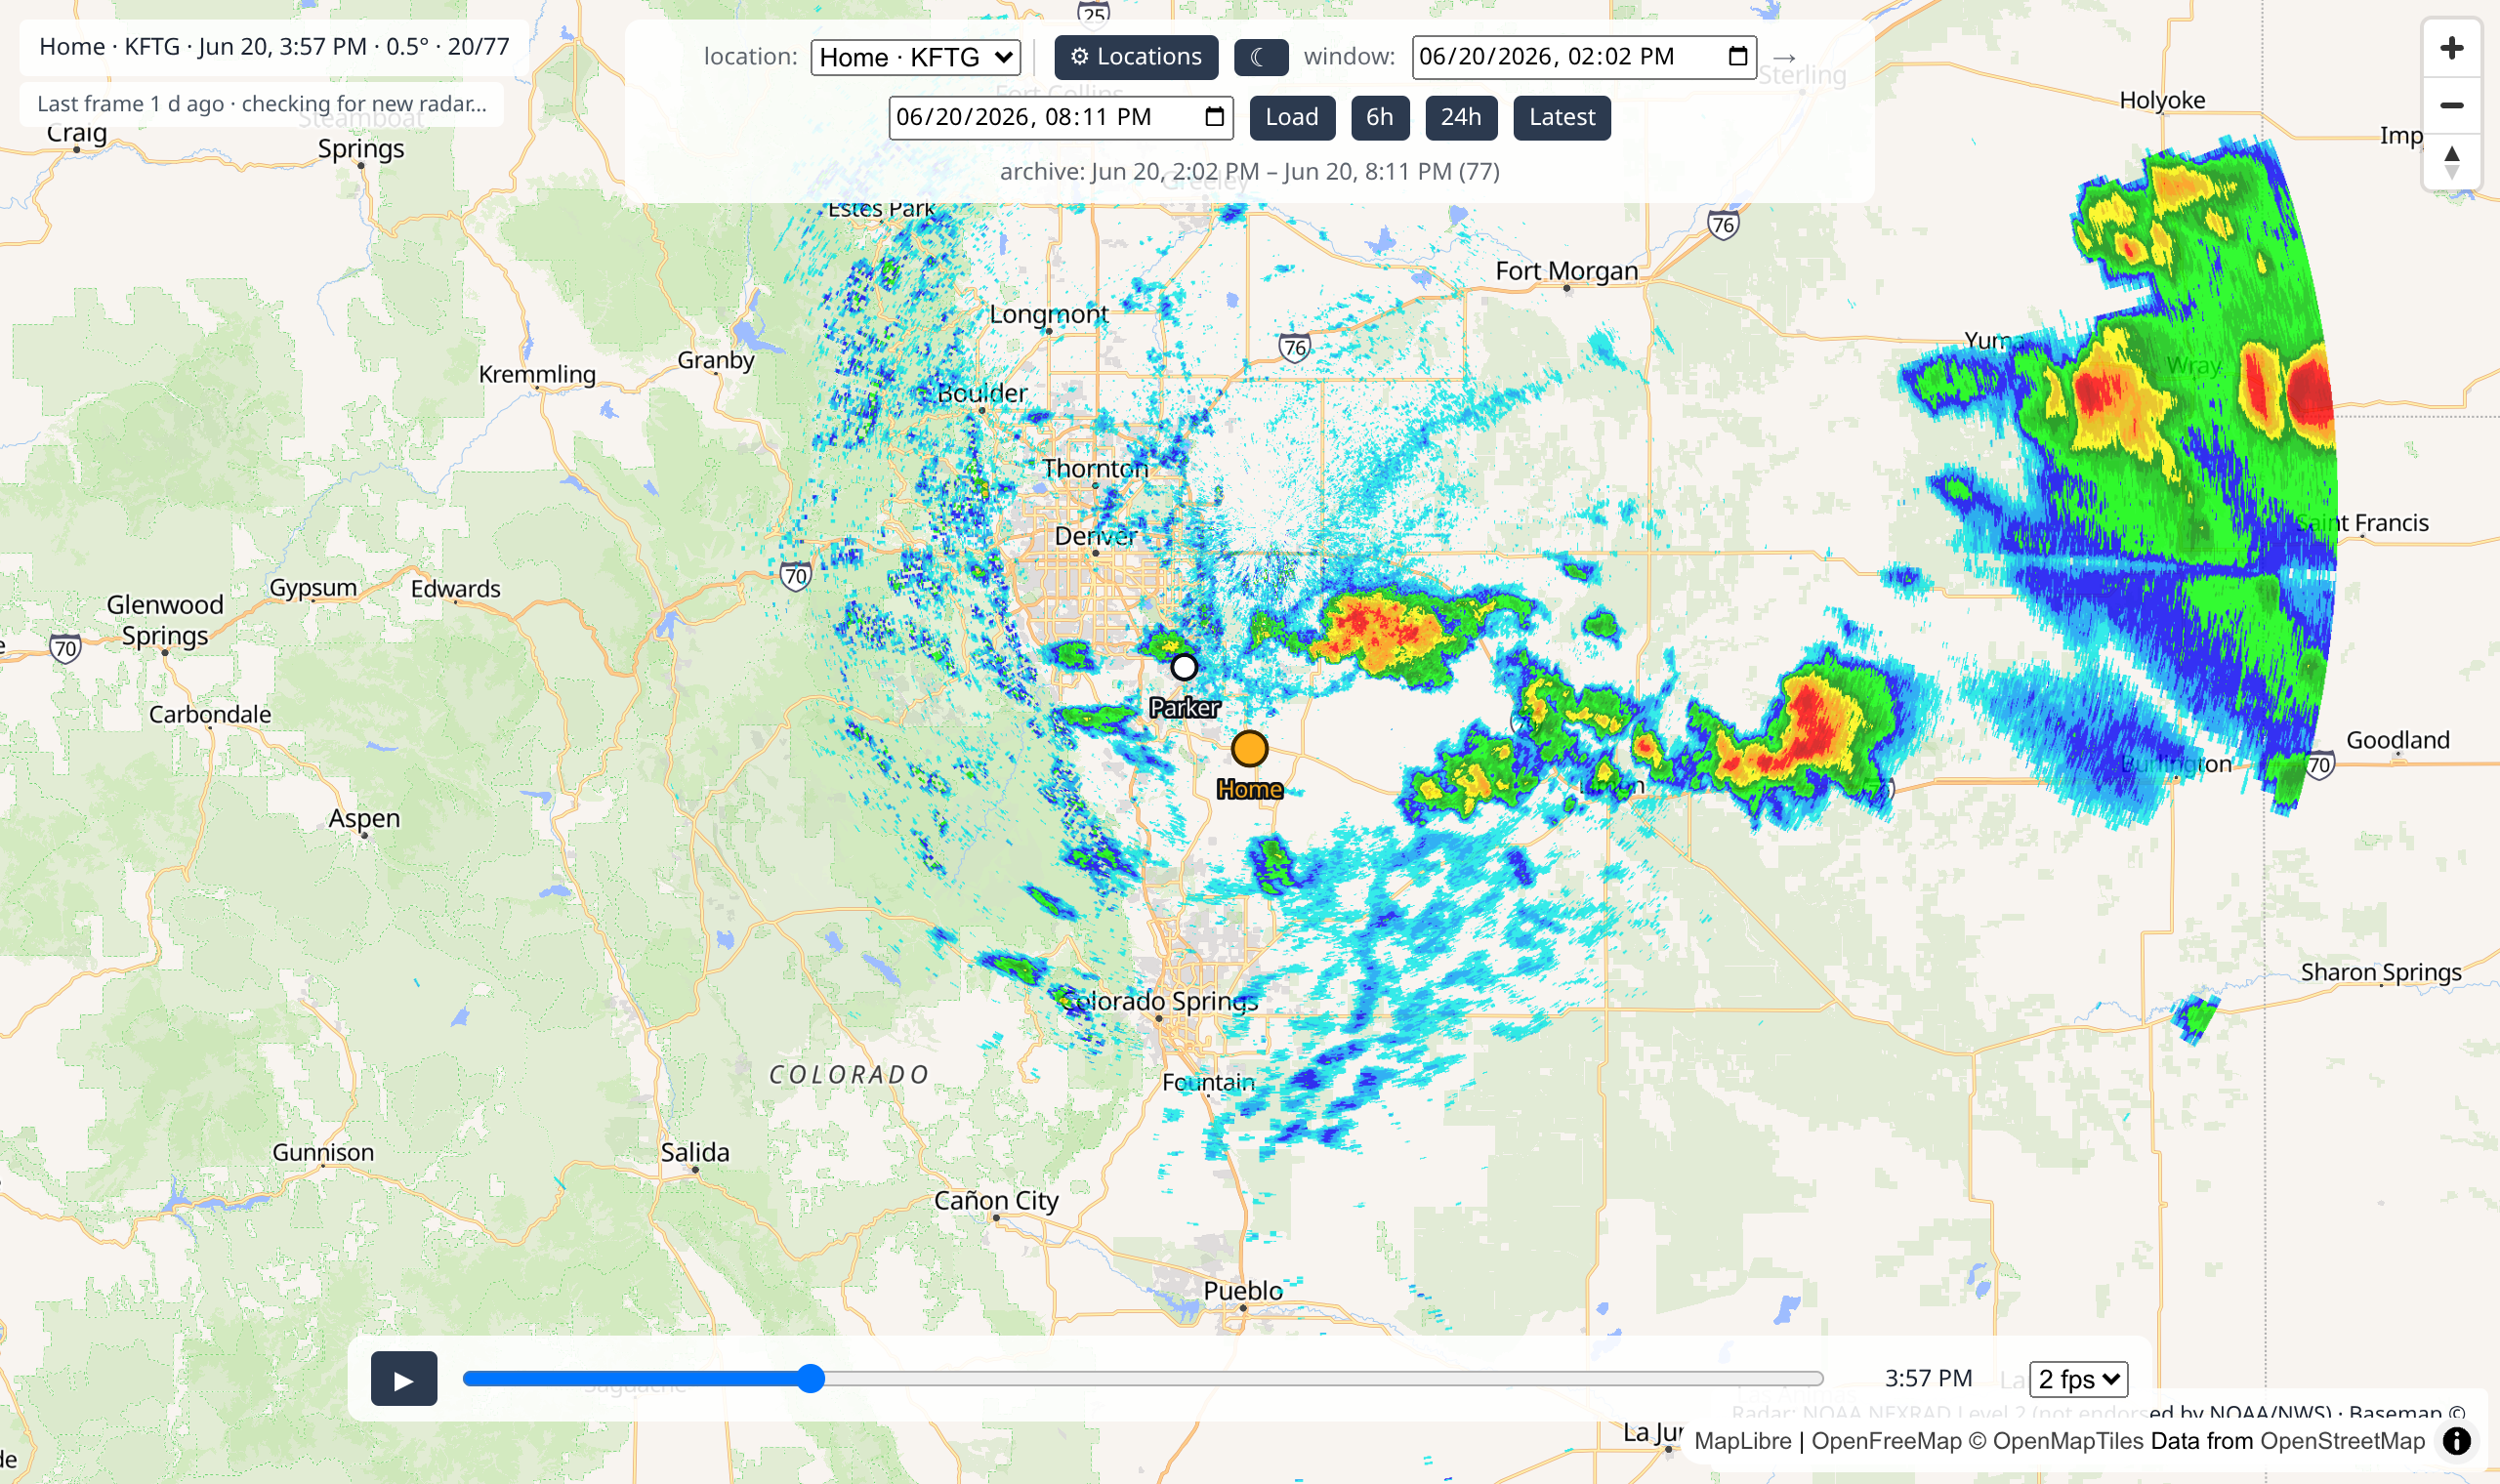
You should see a map centered on your location:
🎉 You did it!
What now?
- It starts empty and fills in over time — a new radar picture every few minutes.
- Want a past storm now? You can backfill older radar — see Help & FAQ.
- Take the Using backscatter tour.
- Stop it with
docker compose down(your saved radar stays put).
Snag? Help & FAQ has the common ones.